
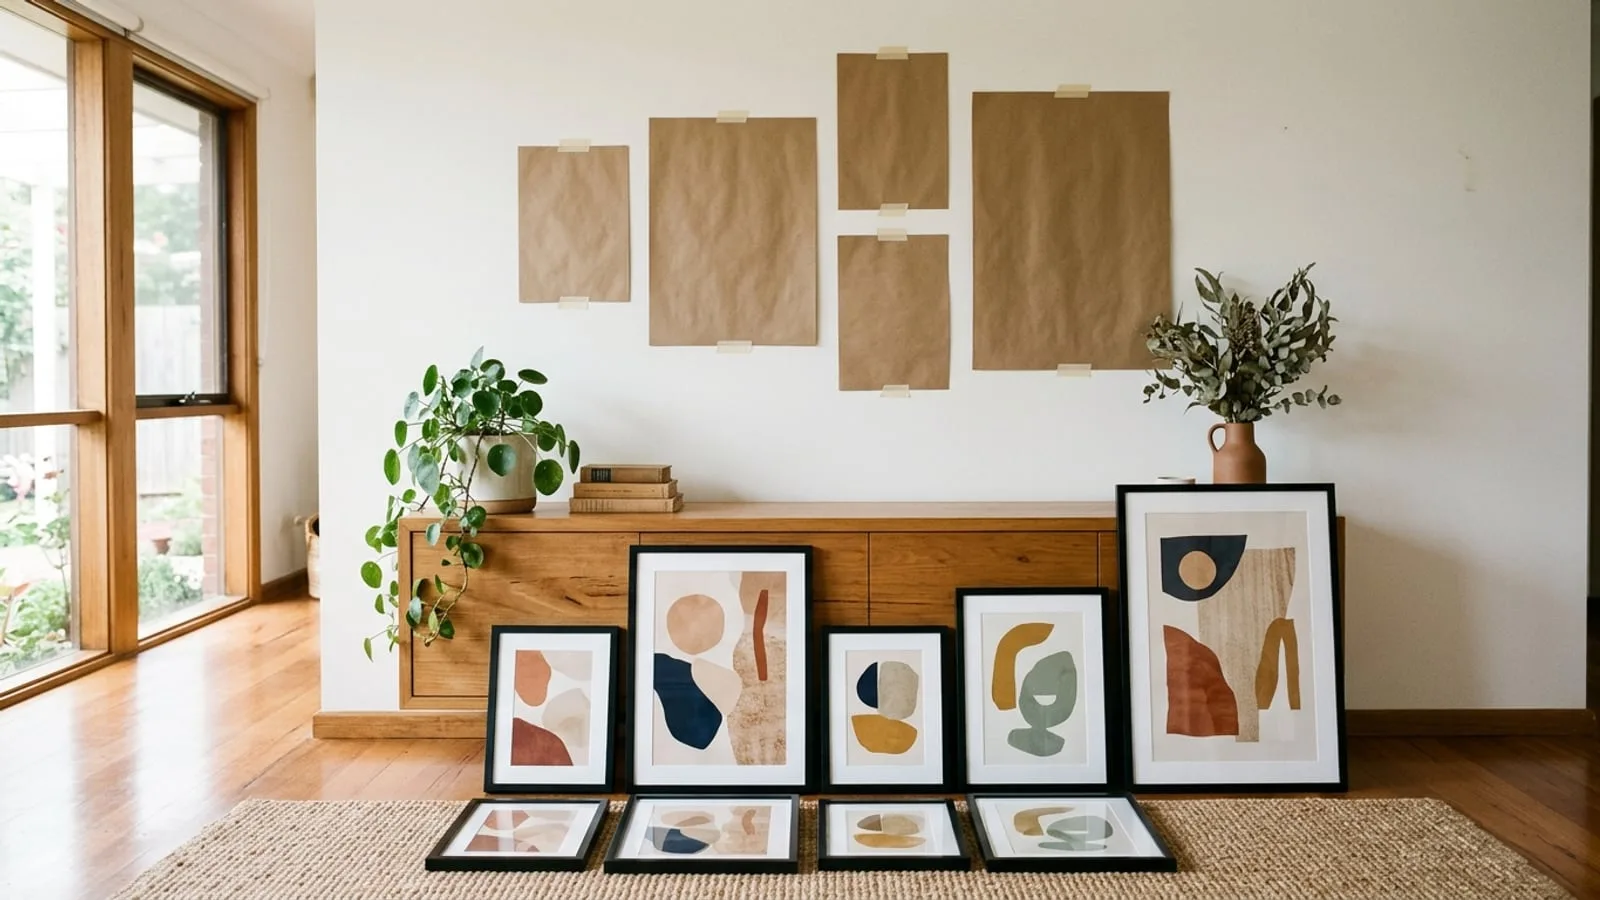
A good gallery wall layout is planned on the floor before anything goes on the wall. Choose one anchor piece, arrange the rest around it with even gaps, and treat the finished group as a single large artwork with its centre at eye level. Then hang from the middle outwards, checking the level as you go.
With summer a few weeks away, a gallery wall is one of the quickest ways to make a living room feel finished before the gatherings begin. It is also easy to get wrong, with frames drifting out of line and gaps that look random rather than deliberate.
Start with the wall and one anchor piece
Begin with the space, not the art. Measure the wall and any furniture beneath it before you sketch a gallery wall layout, and decide how much of that width the group should cover. A group much narrower than the sofa or sideboard below it tends to look lost.
Then choose the anchor, usually the largest or most important piece. Everything else is arranged around it, so it sets the centre, the scale and often the colours of the whole wall.
Leave some breathing room around the edges as well. A group that runs right into a corner, crowds a window frame or sits hard against a light switch looks squeezed in rather than planned.
Lay the gallery wall layout out on the floor first
Museums & Galleries of NSW begins its basic install tips for exhibitions the same way, by spreading the artwork out against the wall where you think it will look good and reordering the pieces until you are happy. At home, the floor in front of the wall works well, with the frames laid flat in the arrangement you are testing.
Photograph each version from standing height so you can compare them side by side. MGNSW also suggests enlisting an objective person to help you make decisions, and a second opinion is worth having before any holes go in.
Once you have a favourite, trace each frame onto kraft paper, mark exactly where its hook or D-ring sits, and tape the templates to the wall. This shows the gallery wall layout at full size and tells you where every fixing goes.
Choose a grid, a salon hang or a shared line
Most gallery walls follow one of three styles. A grid uses frames of the same size with identical gaps for a tidy, modern look, but it needs precise measuring because any error repeats along every row. A shared line hangs mixed sizes along a common centre, top or bottom edge, which suits a long wall above a sofa.
The salon hang is the dense, mixed style. The National Gallery of Victoria explains that by the mid-nineteenth century the annual Salon in Paris presented thousands of paintings floor to ceiling, as closely together as possible, and it describes its own Salon Gallery as holding more than 140 paintings. At home, a salon wall looks deliberate when its outer edges form a clean shape and the frames share a colour or a finish.
Keep the gaps between frames even
Even spacing is what makes a mixed group read as one piece. Pick a single gap and use it everywhere, measuring from frame edge to frame edge rather than judging by eye. Small frames and salon walls suit tighter gaps, while large frames can take a little more space.
Cut a spacer from card or scrap timber to your chosen gap and hold it between frames as you hang. It is quicker than a tape measure and keeps every gap identical, between rows as well as within them.
Set the height of the whole group
Treat the finished arrangement as one large artwork. Take its overall height and width from the templates, then position it so the centre of the group sits at the same eye-level height you would use for a single piece, which our picture height guide sets out.
Above furniture, the bottom row needs to clear the sofa or sideboard comfortably, so the centre may sit a little higher than it would on an empty wall. Settle that compromise with the templates before you drill.
In a hallway or entry, people see the wall while walking past rather than sitting in front of it. Keep the group’s centre at standing eye level there, and avoid deep frames that stick out into a narrow space.
Hang from the centre out
Before any holes go in, check the wall for cables, taking particular care near switches and power points. Then hang the anchor, because every other position is measured from it, and work outwards, checking each frame with a spirit level and your spacer before moving on. Drilling straight through the paper templates and tearing them away afterwards keeps each hole exactly where you planned it.
Give larger frames two fixing points so they stay level, and add small bumpers to the back corners so they sit flat. Anything that tilts when touched will drift out of line in a busy room, and on a gallery wall one crooked frame is all anyone sees.
Make the gallery wall easy to change later
If you plan to add to a gallery wall over time, decide the outline of the finished group now and leave gaps inside it for future pieces. New frames then slot into a plan rather than being squeezed onto the end.
A rail system saves a lot of patching on a wall that keeps changing. Our picture rails support artworks up to 15kg each and let you swap or rearrange frames easily, which suits a collection that keeps growing.
If you would rather hand over the measuring and drilling, our team can help you curate and place a group of works and hang it at gallery standard heights before your summer guests arrive. Our picture hanging page is the place to start.